F5 Firewall Solutions > 1. Class 1: AFM – The Data Center Firewall > 1.7. Lab 6 - iControl REST API Source | Edit on
1.7.7. Simulating and defeating a Christmas Tree Packet Attack
Now that we understand what REST is let’s use it to defeat Joanna one last time. Joanna was feeling festive for her final attack. In this example, we’ll set the BIG-IP to detect and mitigate Joanna’s attack where all flags on a TCP packet are set. This is commonly referred to as a Christmas tree packet and is intended to increase processing on in-path network devices and end hosts to the target.
To interact with the REST API, we’ll be using POSTMan. We’ll then use the hping utility to send 25,000 packets to our server, with random source IPs to simulate a DDoS attack where multiple hosts are attacking our server. We’ll set the SYN, ACK, FIN, RST, URG, PUSH, Xmas and Ymas TCP flags.
POSTMan is installed as an application and can be accessed from the desktop of the Jumpbox
Once you launch POSTMan You’ll then want to import the API calls for the lab as well as the environment variables
- There is a notepad on the desktop labeled “Postman Links”
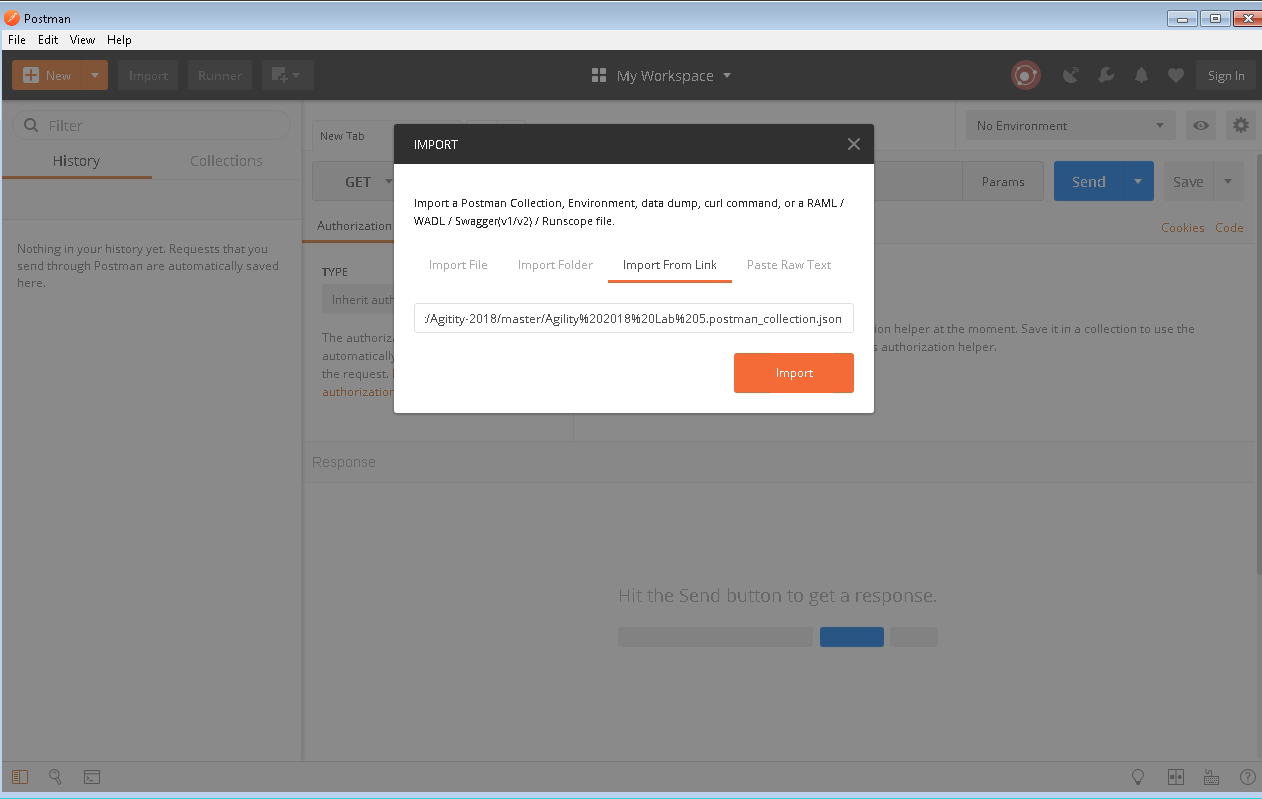
- Within POSTman and click on the “Import” link near the top and then select “Import from Link”
- Copy and paste the collection link from within the notepad and select “Import”
- Copy and paste the environment link from within the notepad and select “Import”
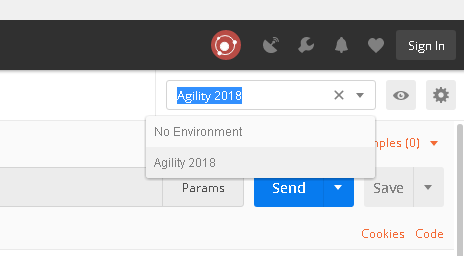
Before proceeding verify the Agility 2018 environment is selected from the drop down in the top right of POSTman
In the bigip01.dnstest.lab (https://192.168.1.100) web UI, navigate to Security > DoS Protection > Device Configuration > Network Security.
Expand the Bad-Header-TCP category in the vectors list.
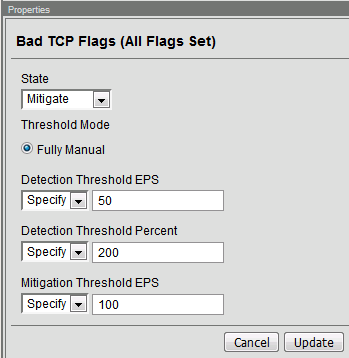
Click on the Bad TCP Flags (All Flags Set) vector name and take note of the current settings
Within POSTman open the collection “Agility 2018 Lab 5”
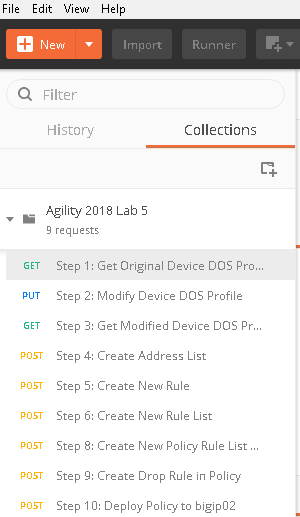
Run step 1 by clicking on the send button to the right

The output from the GET request can be reviewed, this is showing you all the device-dos configuration options and settings. Search for “bad-tcp-flags-all-set” by clicking ‘ctrl +f’. Note the values as they are currently configured. We are now going to modify the Bad TCP Flags (All Flags Set) attack vector. To do so run step 2 of the collection by highlighting the collection and click “Send”.
You can now execute step 3 in the collection and verify the changes, you can also verify the changes in the BIG-IP web UI.
Open the BIG-IP SSH session and scroll the ltm log in real time with the following command: tail -f /var/log/ltm
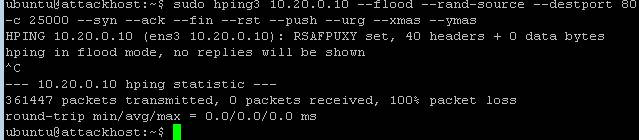
- On the attack host, launch the attack by issuing the following command on the BASH prompt:
sudo hping3 10.20.0.10 --flood --rand-source --destport 80 -c 25000 --syn --ack --fin --rst --push --urg --xmas --ymas - You’ll see the BIG-IP ltm log show that the attack has been detected:

- After approximately 60 seconds, press CTRL+C to stop the attack.
Navigate to Security > DoS Protection> DoS Overview (you may need to refresh or set the auto refresh to 10 seconds). You’ll notice from here you can see all the details of the active attacks. You can also modify an attack vector right from this screen by clicking on the attack vector and modifying the fly out.

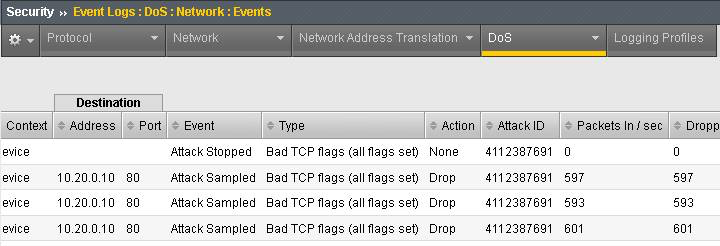
- Return to the BIG-IP web UI. Navigate to Security > Event Logs > DoS > Network > Events. Observe the log entries showing the details surrounding the attack detection and mitigation.
Navigate to Security > Reporting > DoS > Analysis. Single-click on the attack ID in the filter list to the right of the charts and observe the various statistics around the attack.
The same attacks can also be seen in BIG-IQ as demonstrated in the previous lab.
Congratulations, you have successfully defeated Joanna’s festive attack using only the REST API to configure the device!
Since it’s the end of the week and Joanna is using the same IP address continually, lets block her IP address and her subnet using BIG-IQ. We’ll use the REST API to accomplish this as well, as BIG-IQ also has an available REST API.
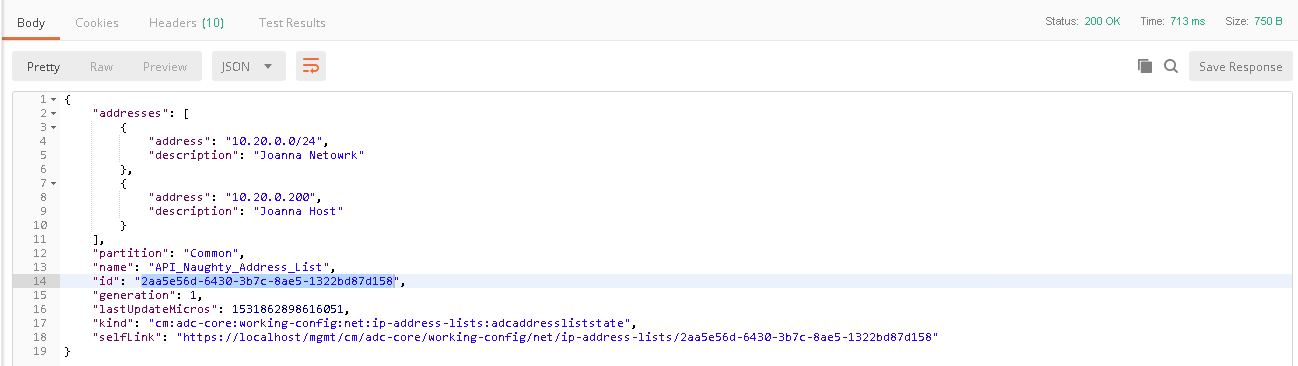
Using POSTman run step 4, this will create an address-list within BIG-IQ, the advantage to address-lists is they allow you to group similar objects into a group. In this instance we’re going to create an address-list named API_Naughty_Address_List with a host and a network. Once you run the command you’ll receive output below. You will need to copy the value returned in the ‘ID” field as shown below:
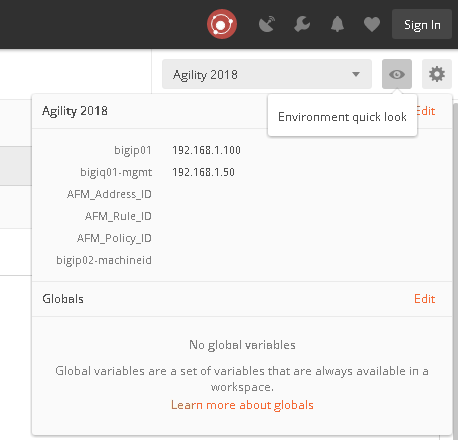
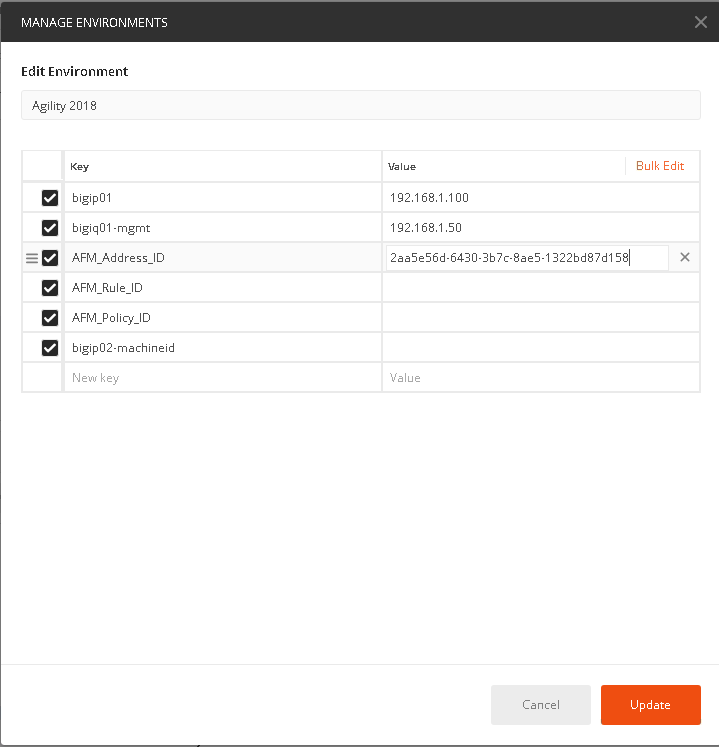
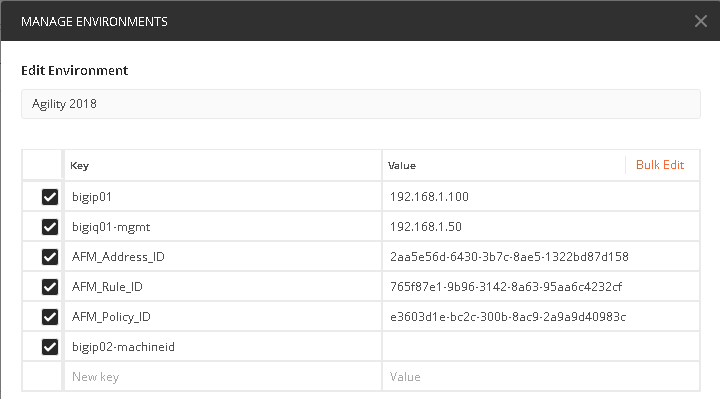
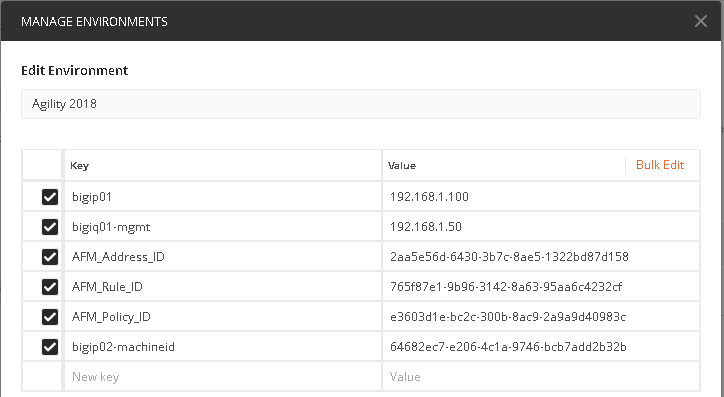
Take the copied text and paste it into the environment variable for AFM_Adddress_ID. The variables are accessed by clicking on the “eye” icon next to where you selected the Agility 2018 Environment:
Click edit and enter the value returned in step 1, when completed click update
We will now create a rule list name first, to accomplish this send the call found in step 5. You will need to also capture the “ID” in this step as well. This value will be updated in the AFM_Rule_ID field
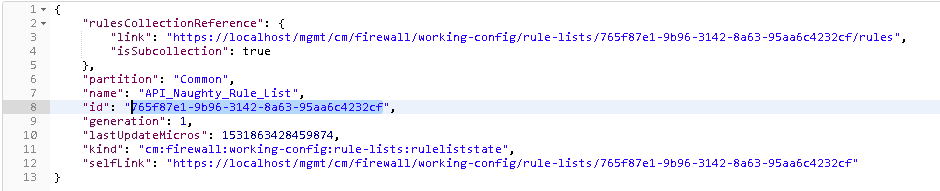
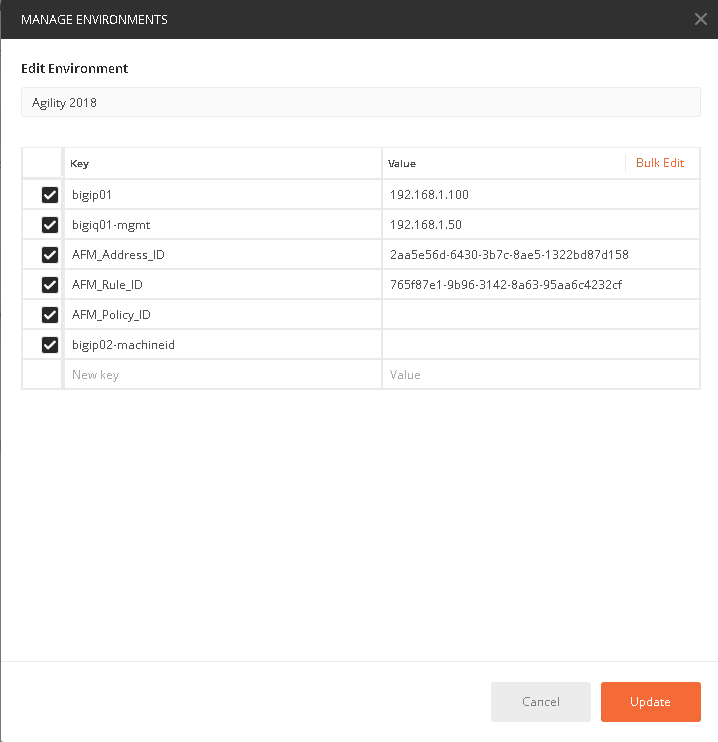
Take the copied text and paste it into the environment variable for AFM_Rule_ID
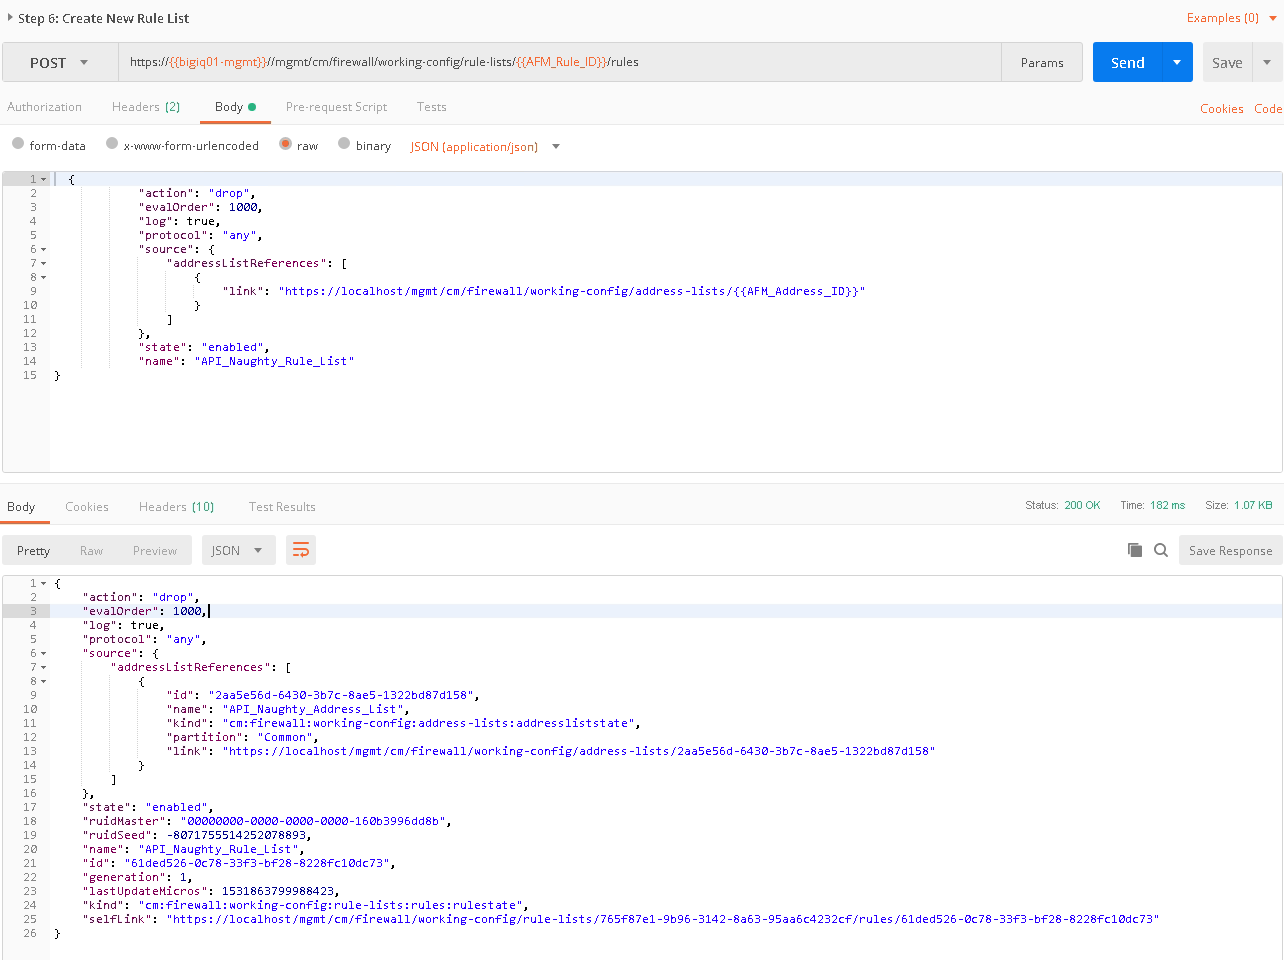
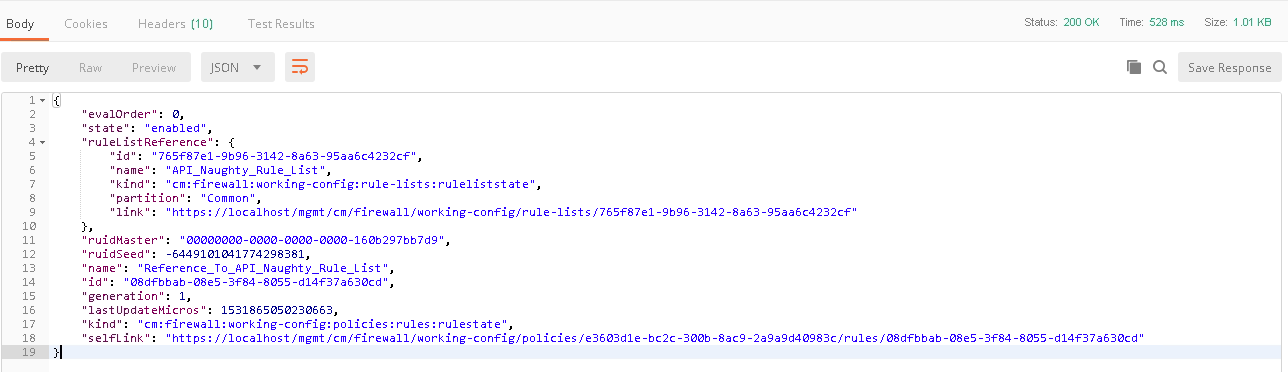
At this stage we have created an address-list with objects and saved the ID, we have also created a rule name and saved the ID. The next step is to add an actual rule to the newly created rule named “Naughty_Rule_List”. Before you send the call-in step 6, take a moment to examine the body of the request. You’ll notice in the URI we’re referencing the variable of AFM_Rule_ID and in the body of the JSON request we’re linking the AFM_Address_ID to the rule. Once sent you’ll receive confirmation similar to the below output.
Since this is an existing environment, we’re going to first need to obtain the policy ID before we can assign the value to this variable. To obtain the policy ID of the existing policy we created in lab 1 and imported in the prior lab, run step 7.
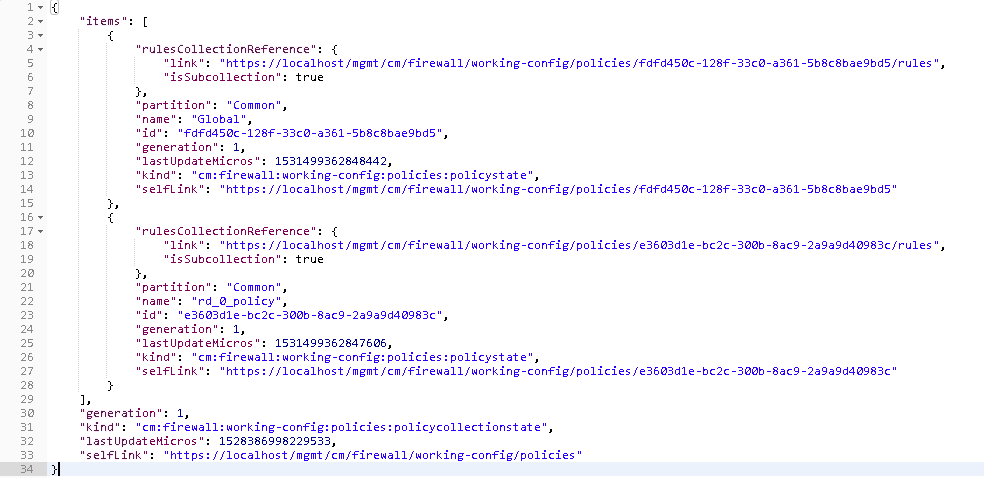
You will notice there are two policies, Global and rd_0_policy, we’ll need to copy the ID for the rd_0_policy which is located directly under its name and paste it into the variable for AFM_Policy_ID.
Finally run step 8 to add the new rule list to the existing policy, when completed you’ll receive output similar as seen below.
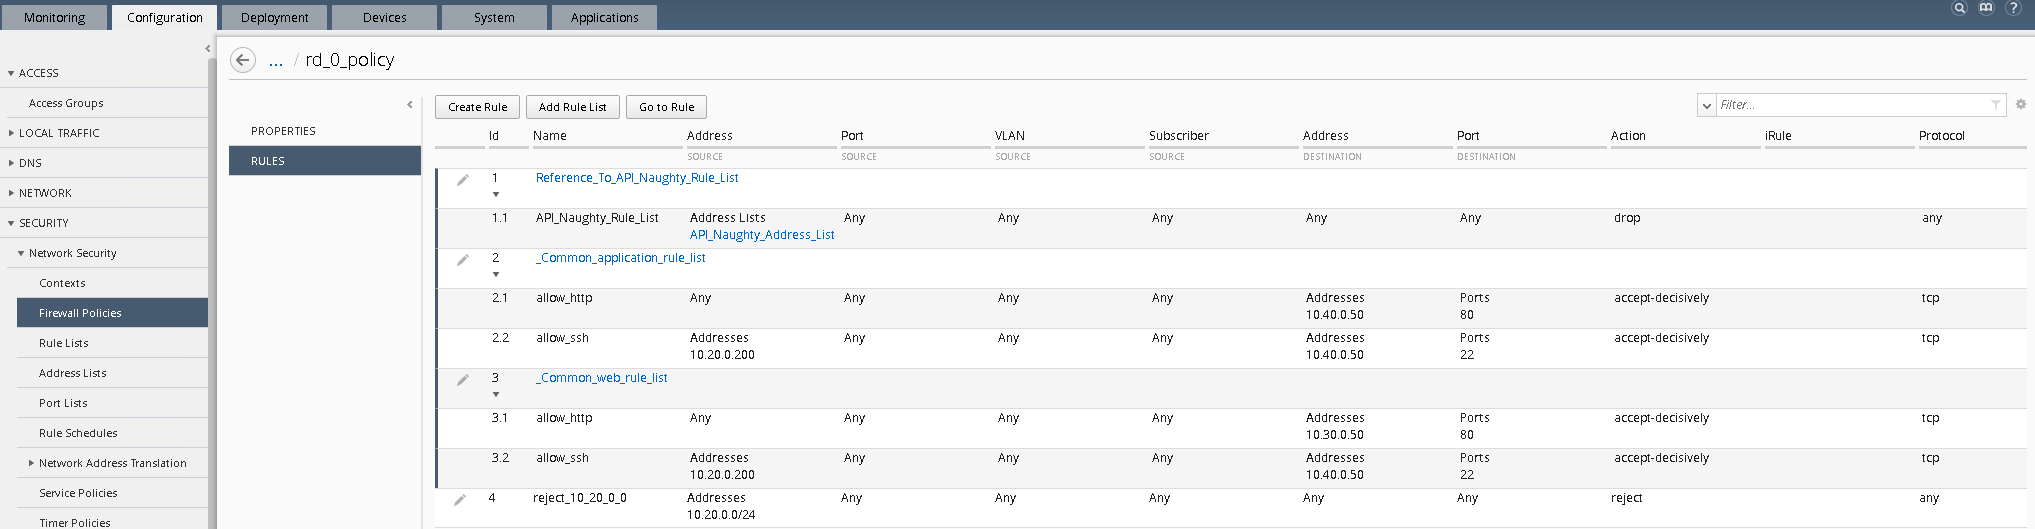
Before we deploy the policy. Log into the BIG-IQ web UI (https://192.168.1.50) and navigate to Configuration Security Network Security Firewall Policies. Click on the link for the rd_0_policy, expand all the rules to verify your new API created rule list is first in the list and all objects are created as expected.
The final step is to deploy the policy to the BIG-IP. Before we can do this, we have one last variable we’ll need to acquire, the machine ID of bigip02.dnslab.test. To obtain the machine ID run the call in step 9, once the call is run, you will look for the machineId key and copy the value to the environment variable bigip02-machined as shown below and click update.

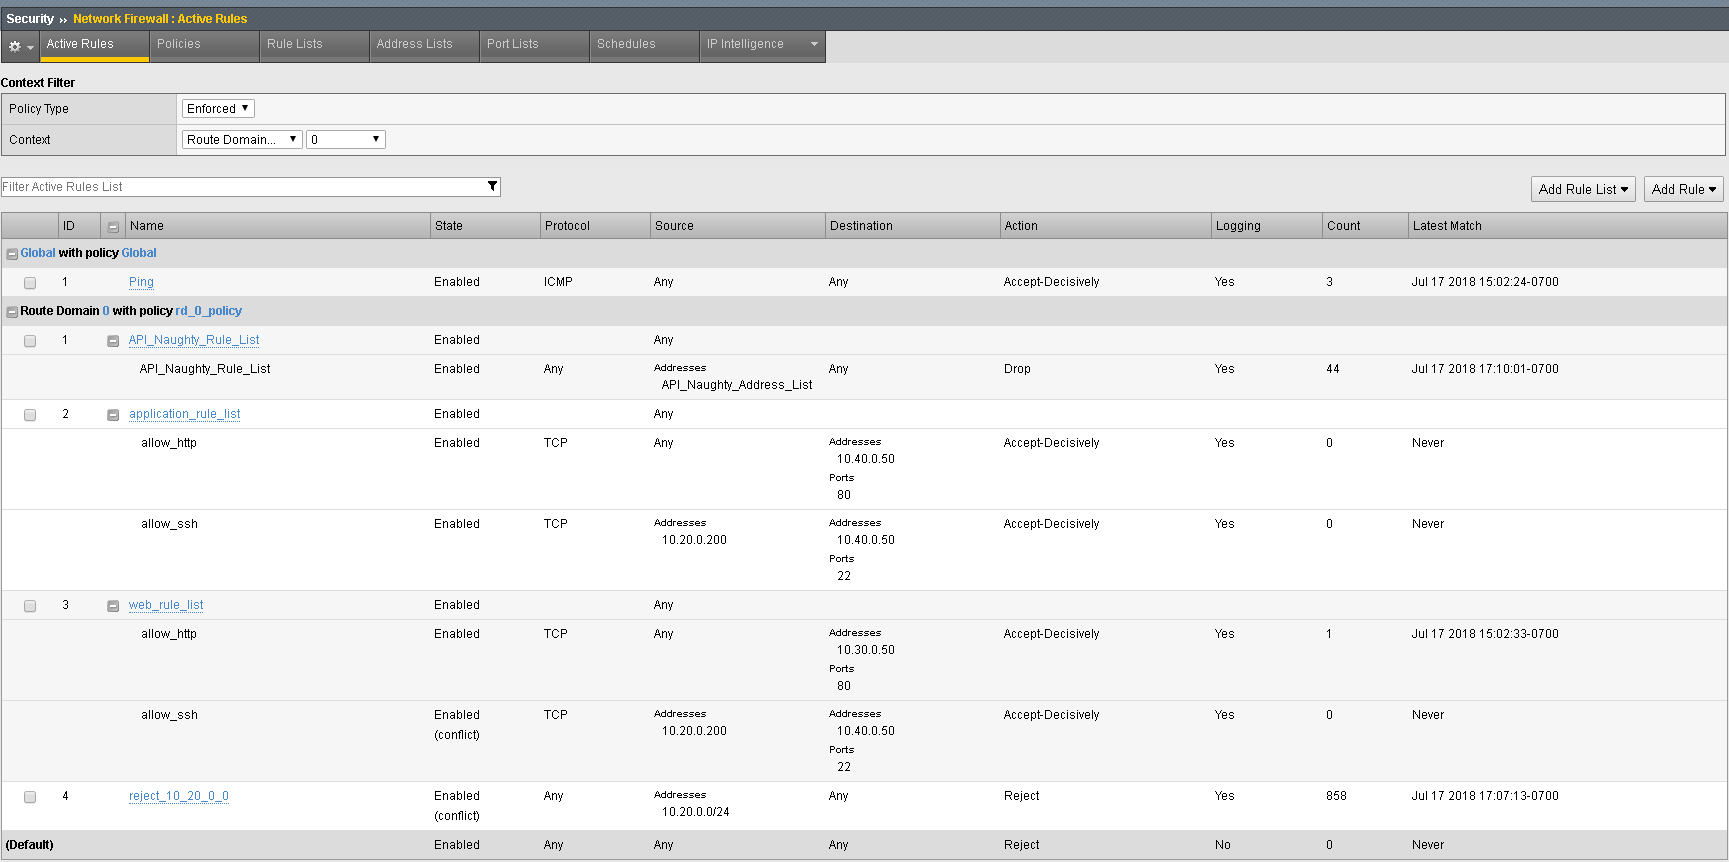
Finally, you will run step 10, this will initiate a deployment on BIG-IQ to deploy the changes to BIG-IP. Within BIG-IQ navigate to Deployment Evaluate & Deploy Network Security. At the bottom in the deployments section you’ll notice an API Policy Deploy task. Feel free to click on the task to investigate the changes. Once the policy has deployed, log into the web UI of bigip02.dnstest.lab and navigate to Security network Firewall Active Rules. Change the context to Route Domain and select 0. Expand all of the rules to verify the rules have been deployed as expected. Your final screen should look something like the screen capture below.
Lastly, in your web browser, verify you can no longer access the web pages http://10.30.0.50 and http://10.40.0.50 as well as no longer being able to SSH to any of the devices.